


There’s always something interesting to photograph in the night sky. The trick, though, is knowing how to capture it.
My first attempts to capture the night sky were bad.
Blurry, underexposed, boring composition. You name it, I’ve done it. The good thing about this trial and error though, is I failed so you don’t have to!
If you’ve always dreamed of capturing the night sky, follow along and I’ll teach you how!
Here’s what you’ll need to capture the night sky:
- A DSLR/Mirrorless camera with excellent low light capabilities (I use a D750)
- A wide angle fast lens (I use a Sigma 35mm 1.4)
- A tripod
- A flashlight
- A remote shutter release (Optional)
- A night time app to help you see where the Milky Way will be. I use Photo Pills!
Choosing the Right Location
Timing and location are everything when it comes to photographing the night sky.
Your first step is to choose a location that’s far enough away from the city lights. In a larger metropolis, this could mean driving 100 kilometers or more to escape the glow of the city. In Thunder Bay, driving half an hour out of the city will get you far enough away.
When selecting your location, make sure it’s interesting. While the night sky is beautiful, adding compositional elements will enhance your images!
Make sure to scout out your location ahead of time and plan where you want to set up your camera. I know from experience this is a lot harder to do in the dark!
Choosing the Right Time
When it comes to timing, you want to choose a night when the moon is at its darkest. The best time to go out to photograph the night sky is during a New Moon. However, I have photographed stars during a quarter moon and ended up with good results as well!
Another thing you want to consider for timing is the time of night you’re going out. Downloading an app like PhotoPills will tell you when true night time is. It’s during this time when you’ll see the most stars! In Thunder Bay, this can happen quite late, around 1:30-2:00 am.
Setting Your Settings
Now that you’ve picked your location and your date that you want to photograph the night sky, it’s time to actually go out and do it!
When photographing the night sky you always want to use a tripod to keep your camera steady. Using a remote shutter release is also helpful in eliminating camera shake.
As for the settings on your camera, you’re going to need a high ISO, a slow shutter speed, and a wide aperture.
You’ll also want to have a high power flashlight to not only assist you with where you’re going but to help you focus as well. While some people prefer to set their lens to Infinity, I prefer to pick a foreground object, shine the light on it, and focus on that. I find it gets me sharper images. But don’t forget to turn the flashlight off before you take the picture!
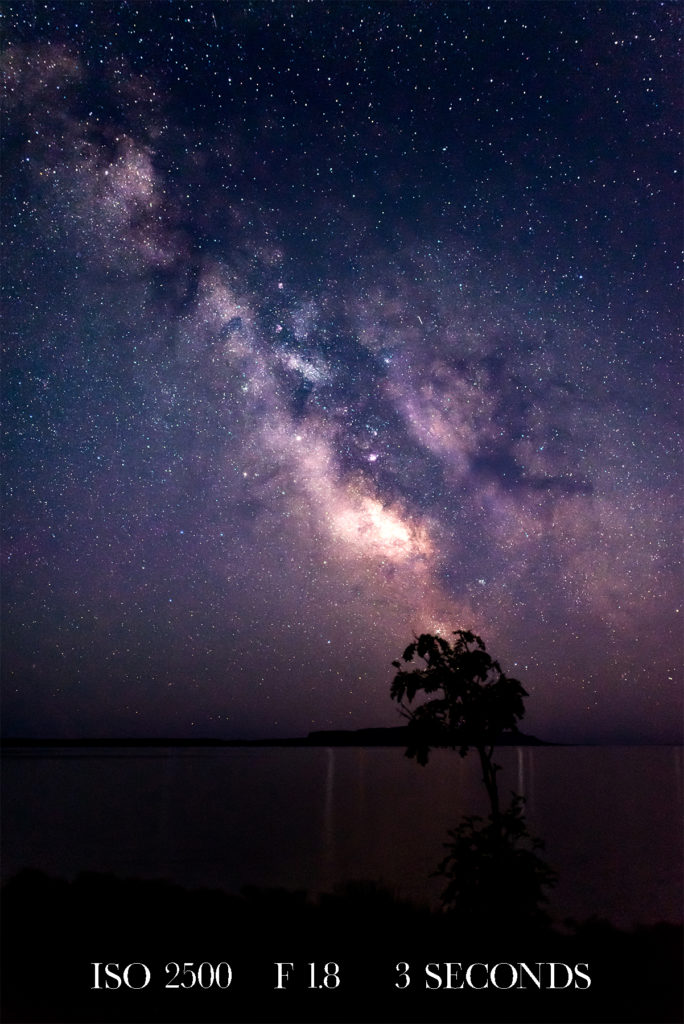
Here are a couple of examples of settings on night-time images I’ve captured.
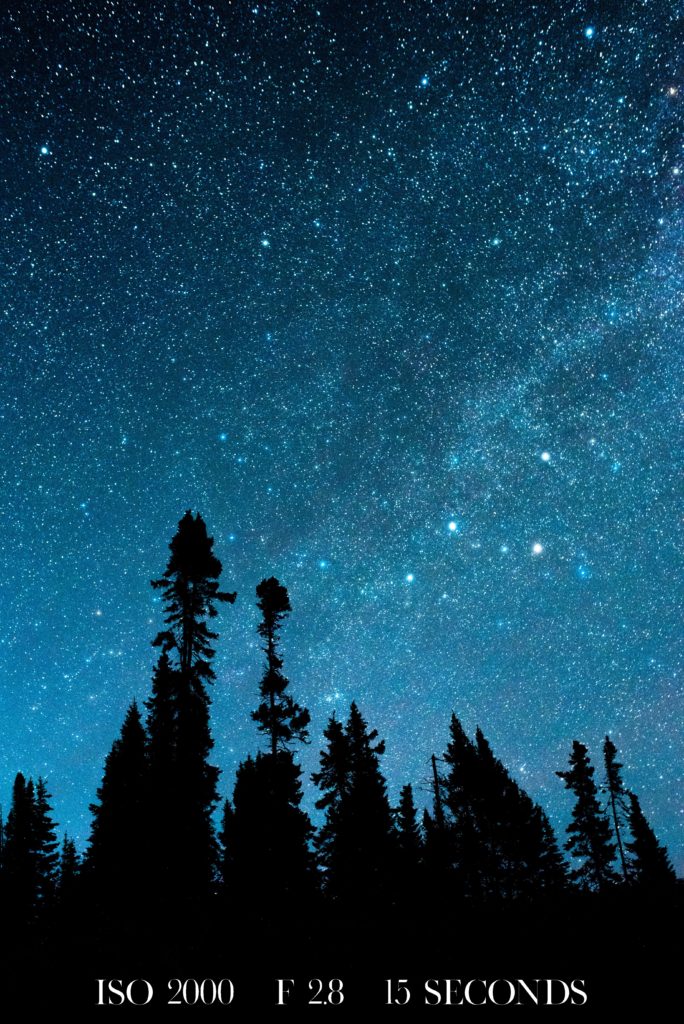
One thing to keep in mind is that you don’t want to leave your shutter open too long since the longer you leave your shutter open, the more movement you’ll see in the stars. I find 15 seconds is a good amount of time.
Don’t be discouraged if your first shot doesn’t end up looking the way you want. I often take 5-10 of the same image with minor tweaks to my settings or the composition before I get an image I’m happy with.
Editing Your Images
You’ve gone out and taken your night sky image but they don’t look like you thought they would. Not because your settings weren’t right but because they look a little… boring. And that’s totally normal! Unprocessed night time images don’t have the same pop as ones that are edited.
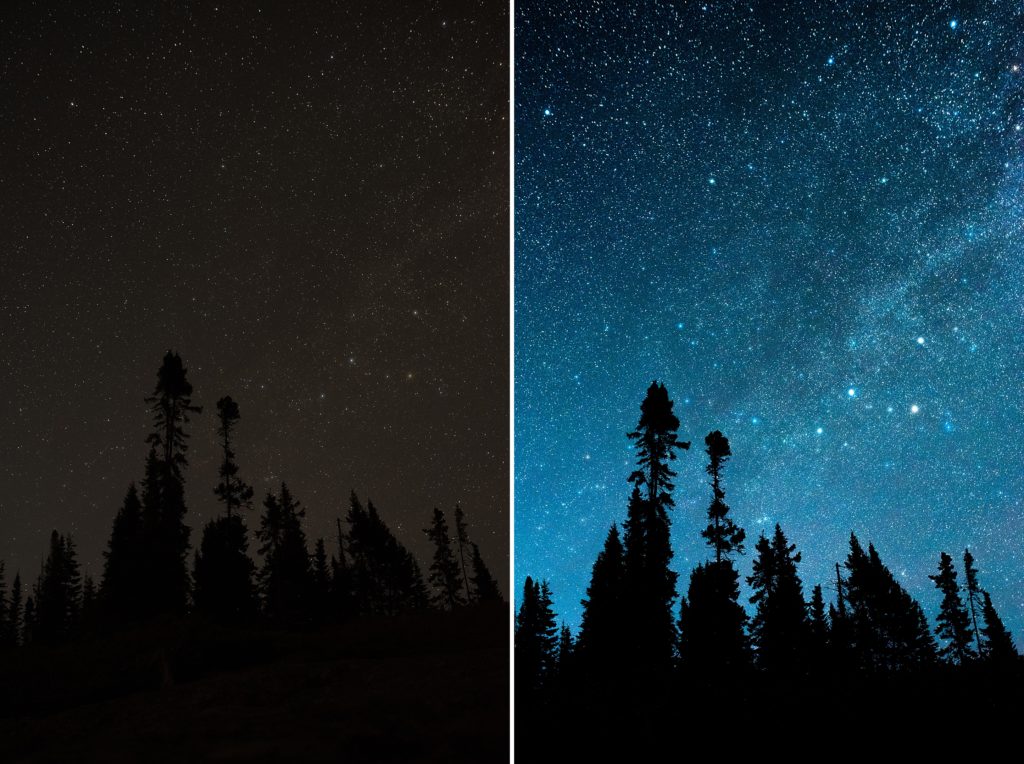
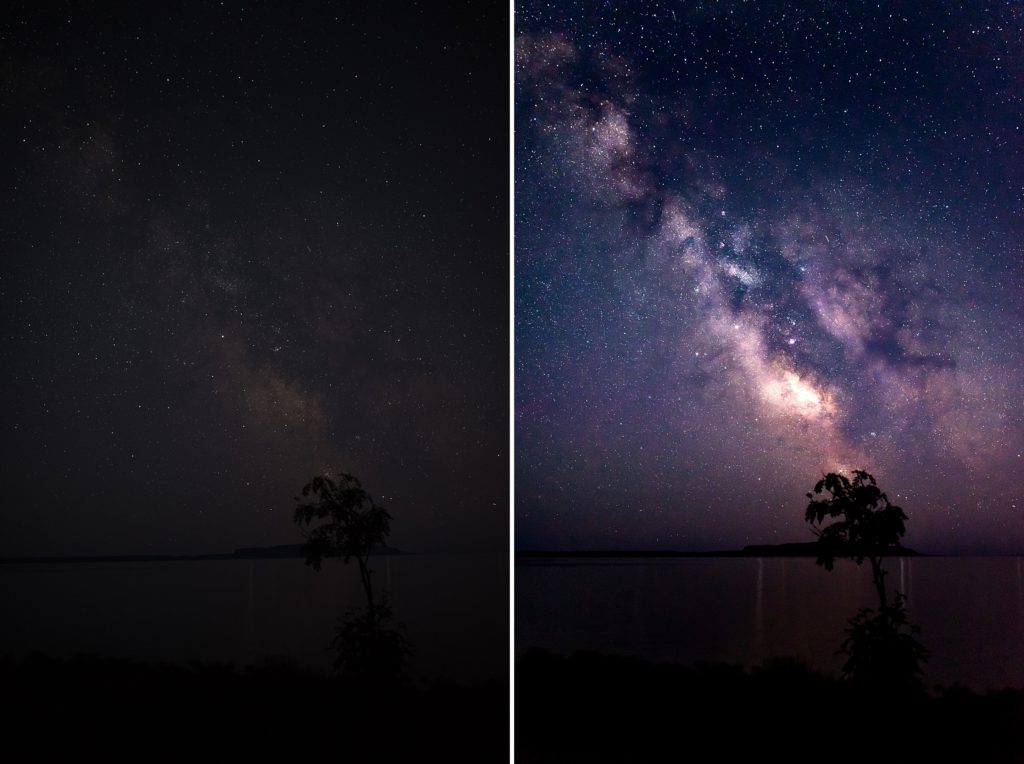
I use Lightroom to edit all of my images. Keep in mind processing night time images is a lot different than processing day time landscapes or portraits. When editing the night sky, I’ve found the trick is to bring out the brightest spots, deepen the blacks and shadows. I then use my adjustment brush to really make the Milky Way pop!
Here are a couple before and afters of the images above.
For some great night time sky tutorials, I recommend checking out YouTube. There are plenty of people who are much better versed in editing the night sky than I am! I hope this blog post helps you on your next night time photography adventure!
XO!
Allison